Access Connections
Access Connections is a very useful Lenovo ThinkPad tool which automates switching the proxy settings (as well as optionally changing your default printer, browser home page) automatically based on the wireless network you are connected to.
This is especially useful for school teachers where a proxy has to be set when at school but unset when at home. If you forget to make the change you find that you cannot browse to the Internet. Changing the setting is one of those annoying jobs, it isn’t difficult but is frustrating.
1) From the Start Menu search for “Access Connections” and click on Access Connections from the list shown.
2) From the Access Connections window, ensure that “Switch to:” says “Basic”, if it says “Advanced” click on the word “Advanced” to enable all options.
3) Click on the “Connect to the Internet” tab.
4) Select the “WiFi” option.
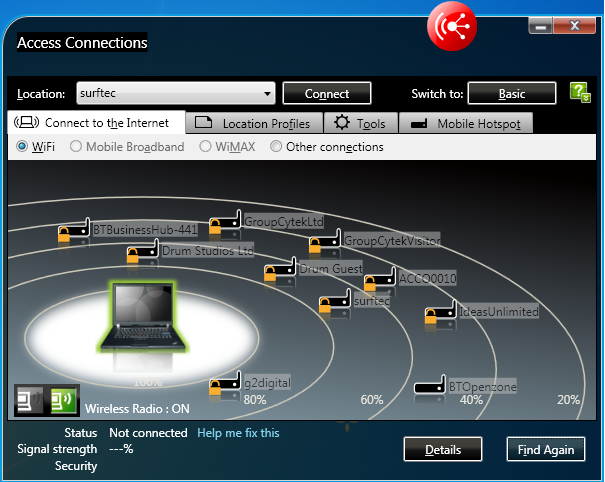
5) Click on “Find” (see fig 1) At this point all available wireless networks within range of your laptop will be shown. Look for the wireless network you wish to join and double click on it.
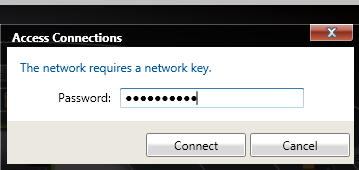
6) You will now be prompted for a wireless key if the network is encrypted. Your Internet Service Provider who provided your wireless router may have provided a card or included your wireless key on a label attached to the router itself. If you or a family member or friend supplied and configured your wireless router you will need to ask them for the key. Enter the key in the box and click “Connect” (Fig 2).
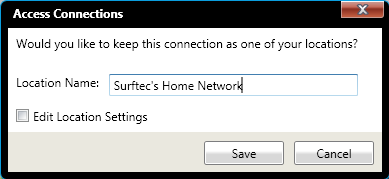
7) At the next window give the network you are connecting to a name, this will be used when reviewing all your wireless profiles so it is important to give the connection a name that is meaningful such as “A Smith’s Home Wireless Network on BT Openreach” or “The Grand Hotel, Winchester”. Then click “Save” (Fig 3).
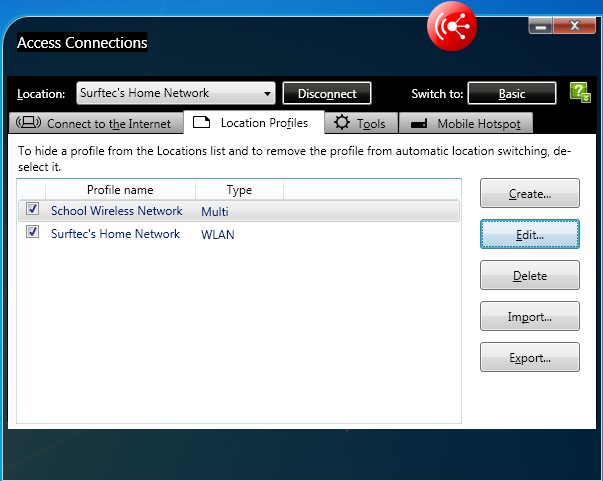
8) Click on the “Location Profiles” tab to view all the wireless networks you have joined previously (if any) and the one you just created (Fig 4).
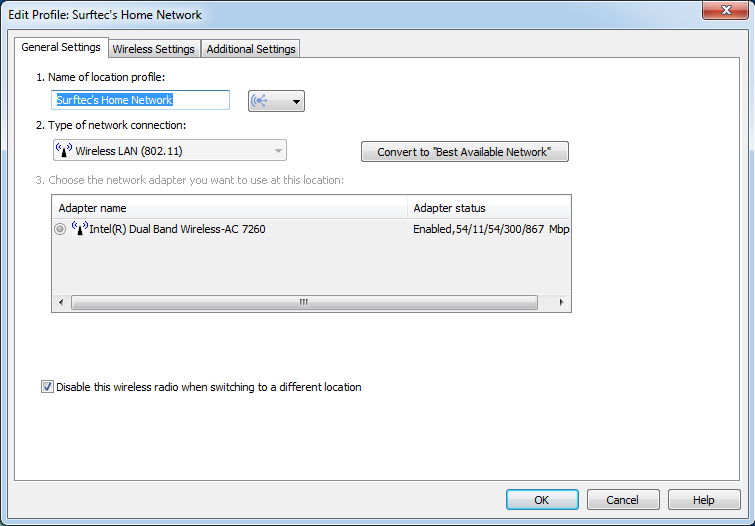
9) Double click on the wireless network profile you have just created, or any network you wish to adjust (Fig 5).
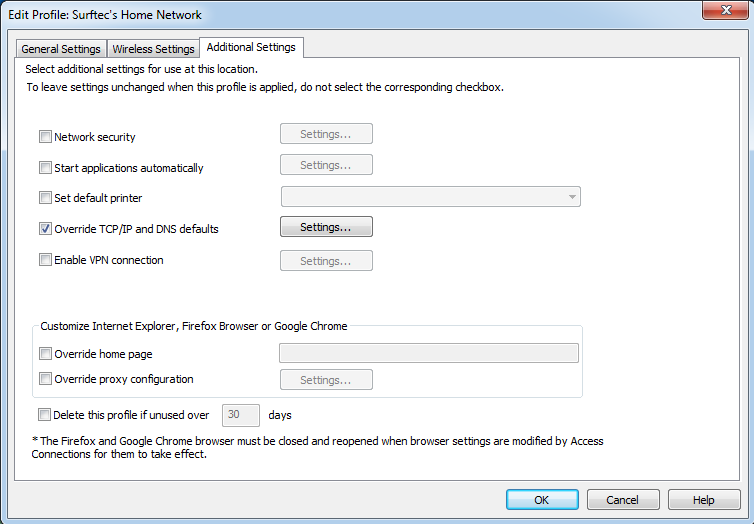
11) Tick “Override proxy configuration”, and click on “Settings” to the right.
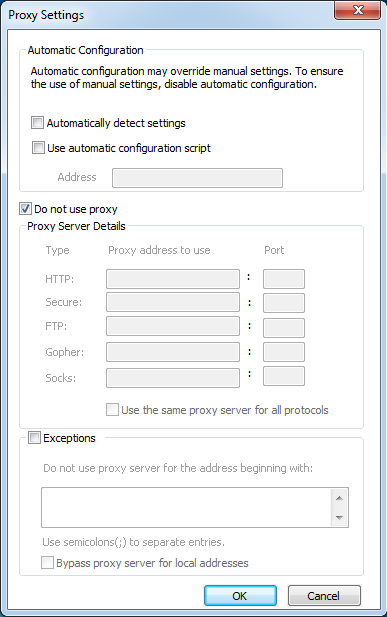
12) Ensure “Automatically detect settings”, “Use automatic configuration script” and “Exceptions” are unticked.
13) Ensure “Do not use proxy” is ticked (Fig 7).
14) Click on OK
15) Click on OK on the window behind.
16) Click on “Disconnect”.
17) Choose your newly created network from the drop down list next to “Location:” and click connect.
18) Now try browsing the web. From now on the proxy settings will automatically change when you move between different places without having to do anything.
Further Options
You can have other things change automatically such as the default printer, home page and so on simply by following the above instructions points 1, 2, 8 to 10, 15 to 17. Remember if you set the default printer at home, you’ll need to also set the default printer at school else it will only change one way and then stay set that way.
Service Visits
If your school subscribes to regular service visits we can assist in configuring the more advanced options. Whilst at the remote site, such as home follow options 1 to 7 and our engineer will then configure everything else during the next service visit. However until that time you will be unable to browse the web until steps beyond 7 have been completed by the engineer.
